Detailed steps and methods for accurately checking whether a chip is damaged
Date:2024-02-23 13:54:48Views:54
In modern electronic devices, integrated circuit (IC) chips play a core role, and their normal operation directly determines the implementation of device functions. When a device malfunctions, troubleshooting and determining whether the chip is damaged is a critical task. The following will provide a detailed introduction to a series of comprehensive and specific methods for checking whether a chip is damaged:
1. Preliminary appearance inspection
Visual inspection: First, visually observe the surface of the chip to see if there is any physical damage, such as cracks, burning marks, pin breakage or bending.
Identification confirmation: Verify the chip model, specifications, and manufacturer identification to ensure they are consistent with the circuit design requirements, and eliminate problems caused by misuse or mixing.
2. Static electrical characteristic testing
DC voltage measurement: Use a multimeter to detect the voltage values of the power pin, ground pin, and other key nodes, compare them with the normal operating range, and determine if there are any abnormalities.
Resistance measurement: In the power-off state, use the ohmmeter range to measure the forward and reverse resistance between each pin, and look for possible short or open circuit problems.
_20240223134507_940.jpg)
3. Dynamic signal analysis
Online functional testing: Connect the chip to the target circuit and send a preset signal through a dedicated testing instrument or self-designed program under powered conditions to check whether the response of the chip output port meets the expected design specifications.
Oscilloscope observation: Use an oscilloscope to capture the waveform of the input/output signal of the chip, check whether the signal amplitude, frequency, rising/falling edge time and other parameters are normal, and whether there is excessive noise, distortion and other problems.
4. Electrical integrity verification
Short circuit detection: Using automatic testing equipment (ATE) or specialized short circuit testers, quickly detect whether there are any unnecessary electrical connections (short circuits) or missing connections (open circuits) between all pins.
5. Special testing methods
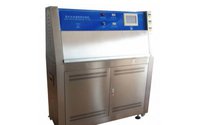
Thermal stability testing: Run the chip in different temperature environments, record and analyze its performance changes, in order to identify potential thermal sensitivity failure issues.
Aging test: Run the chip at full load or close to full load for a long time to evaluate its durability and lifespan.
6. Advanced diagnostic technology application
X-ray fluoroscopy inspection: Using an X-ray microscope to penetrate packaging materials, non-destructive inspection of internal solder joint quality and wire structure for defects.
Ultrasound Scanning Microscope (C-SAM): Using ultrasound imaging technology to detect the presence of bubbles, cracks, insufficient filling, and other difficult to visually identify issues inside the package.
7. Further in-depth analysis
Semiconductor fault analysis: For suspected serious faults, advanced methods such as cross-sectional analysis (Kaifeng), electron microscopy (SEM/TEM), and energy dispersive spectroscopy (EDS) can be used to deeply explore the microstructure of the chip and identify possible failure mechanisms.
In summary, determining whether a chip is damaged is a comprehensive process that utilizes multiple detection techniques and methods. From simple external observations and basic electrical characteristic measurements, to complex system level functional verification and microstructure analysis, every step is crucial. Only through meticulous and rigorous inspection and analysis can the health condition of the chip be accurately diagnosed, and corresponding maintenance strategies or replacement of new chips can be formulated based on this to ensure that the equipment is restored to its optimal working condition.


 Weixin Service

 DouYin
 KuaiShou


